i can’t believe we are only 3 weeks away from halloween! it feels like school just started!
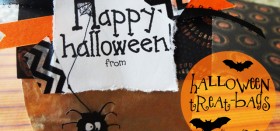
but because it IS almost halloween and because school HAS started, i’ve made a little halloween treat for our school teacher. i’m kind of new to having a child in school, so i don’t know if people typically give halloween gifts to teachers? regardless, i figure if you have as amazing a teacher as we have, you should look for every opportunity to show your thanks!
this is an idea i saw a long, long time ago on kmckaydesigns and i thought it was adorable. what a great idea to re-use a pop-top can and turn it into a one-of-a-kind gift! i think the best part is that the receiver clearly has no idea what is inside the can and probably hasn’t even thought of the fact that you could have put something in there yourself! and so it truly is a surprise!
as you can clearly see, we’ve made ours for a school teacher for halloween. obviously the concept and steps will be the same no matter what occasion or holiday for which you decide to make this. you can change the paper, ribbon, and embellishments to suit your need. to get the candy (or whatever it is you decide) in the can in the first place, here’s what you need to do:
1. find a pop-top can that has not been opened (and that you’re going to use!). i used a pineapple can. do not open the top! instead, flip the can upside down and use a can-opener (the kind that cuts the can cleanly straight across – see pictures below) to open the bottom of the can. empty. wash and dry both the can and the lid thoroughly.


2. once it’s totally dry, fill the can with candy or other treats. if you wanted to put a note of some kind in the can, put it in first so that when you flip the can right-side up, the note will be on the top.

3. now you need to hot glue the lid back on to the bottom of the can. this is where i ran into trouble. it’s not easy getting hot glue to keep from cooling down and hardening before you’re even around the whole perimeter of the lid! seriously – i was fast (and, by the way, the faster you go, the messier and clumpier it gets), and it kept hardening before i could even get the lid back onto the can. this is how it turned out:

see how bumpy and unattractive that is?! luckily, i could just peel the glue off. after trying 3 or 4 times, i decided this wasn’t working.

so instead, i put the lid on the can, and ran the glue gun around the perimeter, angling it upwards so that the hot glue would get up and underneath the lip of the can. it actually worked AWESOME!!! and it looked much, much cleaner and more uniform. it was so much easier to keep the glue gun still with one hand and turn the can with the other hand vs. trying to get the glue gun itself to go in a smooth, consistent line all the way around the lid before it all dried. and please note: even if the glue does end up looking a little bit messy, it will get covered up by paper anyway, so you don’t need to worry about that!


4. the hardest part is over! now all you need to do is decorate. i used double-sided tape to get the paper onto the can. measure out the height and circumference of the can + a little a bit of extra so it overlaps; secure with tape to can; wrap paper around can; secure the end with more tape.


5. a lot of these cans have instructions on the top for how to open them. i guess you don’t need to cover this up, but i wanted to, so i did. first, trace the can onto the back of your patterned paper. next, draw a circle just inside that line. how big or small you make that inside circle is up to you. cut out the smaller circle.


6. all you need to do is cut out a little notch for where the tab attaches to the lid.

7. secure with a little more double-sided tape, and you’re good to go!

8. add some ribbon to the tab if you like that look. or embellish the can however you want! have fun with it.

9. if you want to give this to your kid’s teacher for halloween and want to use this printable label, click here.

10. enjoy the look on their face when they open the can to find something just for them inside! it’s a trick AND a treat – you can just tell them it’s magic!


Oh my goodness, I love it. I’ll have to dig out my hot glue gun, but it’ll be well worth it! Thanks!
What a great idea to use hot glue to smooth out the top of the can! I’m always wanting to use cans for crafts and such, but I’m afraid my kiddos would cut their fingers. Now I have a solution.
This is great! I may use this for other holidays too… Thanks!